|
Batch Watermarker 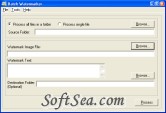
|
Want to notice on the "copyright" of the images that you have on in your web, or simply to add a personal signature to your creations in 3D You work hard to take great photography and should be rewarded for your efforts. Watermarking your images is a way to reduce theft and to get recognition for your creative talents. But how can we add watermarks on our images Don't worry about it! Batch Watermarker can do the job for you! Following is the detailed introduction of this image watermarks maker. Give it a try and protect your production now!
Batch Watermarker is a powerful tool that helps us create watermark/overlay to protect our intellectual properties. Batch Watermarker can add watermarks (either image, text, or both) onto our graphic files in batches. All we need to do is to tell it where our graphic files are, what watermark logo/image or text to use, and Batch Watermarker will do the rest for us! Batch Watermarker requires Microsoft .Net Framework 2.0 to run on your computer. If you have not installed Microsoft .Net Framework 2.0, the installation program will automatically download it for you. Batch Watermarker provides a free trial for us but all images that are processed with the evaluation version of Batch Watermarker will have the "Trial Version" watermark on them.
Following are the key functions and advantages of this image watermarks maker, including:
1. Batch Watermarker is very easy-to-use. It provides a user's guide for us, but we should not have to refer to this user's guide too often since Batch Watermarker's user interface is simple, intuitive, friendly, and easy to understand.
2. All functions and options of Batch Watermarker presented on its main screen. We can select the source folder or file, watermark image or text, and process the images here. We can also preview our image on it.
3. If we would like to process all image files in a folder, we can select the "Process all files in a folder" option. We can then type in or browse to the path of the images where we would like to create watermarks for. The path is referred to as "Source Folder" on the screen. If we would like to create watermark for one single file, we can select the "Process single file" option. We can then type in or browse to the image file where we would like to create watermarks for. The path is referred to as "Source File" on the screen.
4. Image formats supported by Batch Watermarker are: bmp, emf, exif, gif, ico, jpe, jpeg, jpg, png, tif, tiff, and wmf. Batch Watermarker does not process any other image formats that are not mentioned above. If an animated file is supplied, Batch Watermarker will process only the first frame.
5. After we have specified the Source Folder or Source File, we need to tell Batch Watermarker what watermark image or text to apply to our source images. We can provide both the image and the text for our watermark. We can provide just the image or just the text. However, we can not leave both the "Watermark Image File" and "Watermark Text" text boxes empty.
6. We can either type in or browse to the watermark image file. Batch Watermarker knows how to render transparent gif file. The transparent portion of the gif file will stay transparent, revealing the source image behind it. Watermark image formats supported by Batch Watermarker are: bmp, emf, exif, gif, ico, jpe, jpeg, jpg, png, tif, tiff, and wmf. If an animated watermark file is supplied, Batch Watermarker will process only the first frame.
7. We are allowed to enter multiple lines of text in the "Watermark Text" text box. Batch Watermarker knows how to render carriage return (the "Enter" key). We can also type special characters (like , , etc) into the text box. They will be rendered properly in the processed images.
8. Once we have input our source folder/source file and watermark image/text, we are ready to start the process. Just click on the "Process" button and watch Batch Watermarker do the work. A progress bar will be displayed to show us which file it is processing. Once the process is completed, a link that says "View images in Destination Folder" will be displayed under the Destination Folder text box. We can click on the link to browse to the folder where the processed images are saved.
9. The Options Screen allows us to set different settings of the watermark. It also allows us to preview the watermark before the image is processed. All the settings will be saved if we click on the "OK" button after changing the settings. The settings stay the same if we click on the "Cancel" button.
10. If we would like to preview our source image before it is processed, we will need to choose the "Process single file" option on the Main Screen. Once we have picked the source file, the watermark image or text, we will be able to preview the source image with the watermark image or text that we specified. We can then change different settings on the Options Screen and the image will be rendered on the fly to show us how it will look like when we actually process it. If we would like to process all files in a folder after we have previewed a source image, we will need to select the "Process all files in a folder" option and select the folder location before we click on the "Process" button. There is no option to preview multiple source images at the same time. We will need to preview one image at a time.
11. If we have specified a "Watermark Image File" from the Main Screen, we can control the position of the watermark on the Options Screen. We can specify the Horizontal Position (Left, Center, and Right) and Vertical Position (Top, Middle, and Bottom) of the watermark. We can also specify how far (in pixels) from the edge of the source image we would like to place the watermark. We can also change the opacity of the watermark from 0 to 10. If we set the opacity to 0, the watermark image will be totally transparent and we will not be able to see it.
12. Additional functions include: Allow 10 different levels of image watermark opacity. Choose from 71 font families with different font styles, sizes, and colors. Create text watermark with solid color, chiseled, and three-dimensional text effect. The program remembers all settings set by us and much more.
With all these features, simple interface, excellent usability and free trial - why are you still reading Download the free trial now and experience how powerful and effective it is at once! If you feel this utility is helpful indeed, introduce it to your friends please!
Are you spending too much time on repetitive tasks like putting logos and copyright information onto your images? Would you like to protect your intellectual properties without having to spend hours or even days doing it?
Batch Watermarker can do the job for you!
Batch Watermarker is a powerful tool that helps you create watermark/overlay to protect your intellectual properties. Batch Watermarker can add watermarks (either image, text, or both) onto your graphic files in batches. All you need to do is to tell it which folder your graphic files are stored in, what watermark logo/image or text to use, and Batch Watermarker will do the rest for you!
Below are some of the highlights of Batch Watermarker:
1) Ability to add image and/or text watermark in folder mode or single file mode.
2) Full control over the location of the watermark.
3) Allow 10 different levels of image watermark opacity.
4) Choose from 71 font families with different font styles, sizes, and colors.
5) Create text watermark with solid color, chiseled, and three-dimensional text effect.
6) Preview image before watermark is applied.
7) Save processed files to a folder specified by user.
8) The program remembers all settings set by user.
The license of this software is Free Trial Software, the price is $40, you can free download and get a free trial.